
Tools needed: Dotting Tool (or mechanical pencil, toothpick, etc.) and a Sponge

Four Leaf Clover Nails is something I have never done before, so hopefully you will like what I’ve come up with. Saint Patty’s Day is tomorrow and what better way to show your festive side by painting a four leaf clover. Let’s begin!
Here are my Saint Patrick’s Day nails in a step-by-step tutorial:

1. Start with a base coat to protect your natural nail bed.
2A. Paint the entire thumb and pinkie nail with your mint green base color until it is opaque.
2B. Paint the entire pointer and middle nail with your white base color until it is opaque.
2C. Paint the entire ring finger nail with your darkest green color until it is opaque.
Gradient:

3. Take the end of your sponge and paint the tip twice with a white polish. You will be doing a gradient nail on your ring finger. Apply this to the tip area only, making sure not to go past mid nail. 
4. Repeat step 3 using the darkest green polish to apply it to the pointer finger nail.

5. It will get messy but no worries. You should end up with nails that look like this.
Polka-dots:

6. Take out your dotting tool, metallic color, and both green polishes. Dot three rows. Down the middle of the nail, dot on your metallic color. On both sides of the metallic dots, dot on your mint green polish. Take your darkest green and layer this on top of the metallic dots. The metallic dots will serve as a background for the dark green polish.
Four Leaf Clover:

I’m taking some steps from my hearts tutorial to make the four leaf clover.
7A. With your metallic polish, dot on a small heart in the corner of the nail bed.
7B. Repeat Step 7A for each corner.
7C. Draw a thin line connecting all four hearts, extending the line all the way to the bottom.

8. Repeat Steps 7A-7C with your mint green polish on your ring finger.
9. Clean up around the gradient nails with some nail polish remover.
10. Once the manicure is done, seal the nail art design with a quick drying top coat. This will make the nail look shiny and the design last longer.
Some of you may have already celebrated Saint Patrick’s Day on the previous weekends — LepreCon. If you’re still celebrating this week then have fun and be safe!
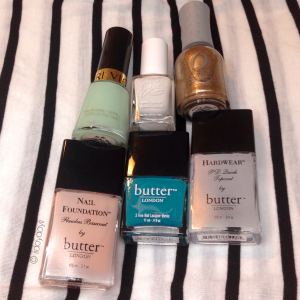 List of Products:
Butter London Nail Foundation Flawless Base Coat
Butter London Hardwear P.D. Quick Top Coat
Butter London Slapper
Julie G White Orchid
Revlon Minted
ORLY Luxe
I’d love to see your manicure. If you end up trying this nail look out, show/tag me on Instagram using the hashtag #iidoydoyii

Love!
LikeLike
Thank you!
LikeLiked by 1 person
YW 😊
LikeLike
Wow!!!! Looks great!!!
LikeLiked by 1 person
Thank you!!! 🙂
LikeLike
Great step by step pictures! I bought a gradient nail kit by China Glaze but have yet to use it. I really like the results!
LikeLike
Thank you so much! I’m still getting the hang of doing a gradient nail. It’s so much fun and it turns out nice. I think I can improve it.
LikeLike
love Love love this 🙂
LikeLike
Thank you so much!
LikeLiked by 1 person
Aww those are so lovely! ❤
LikeLike
Thank you! I’m glad you like it!
LikeLiked by 1 person
Hi ! Love your blog, and your creativity! Keep up the great work
I have nominated you for the Liebster Award because I love your page so much! PLease follow the link provided.
xox Thera
LikeLiked by 1 person
Thank you again! I posted my answers on your blog post if you didn’t see them already.
LikeLiked by 1 person
This came out AWESOME!!!! I love all of the shades of green and your nail art is always on point! ❤
LikeLiked by 1 person
Thank you so much, Laurel! That means a lot coming from you 🙂 You’ll be proud to know that I got a new nail polish set. Bright colors — whoop! I’m gonna post a haul soon.
LikeLiked by 1 person
You’re very welcome! Ohhh, I’m so excited to see the new nail polish set! Love some good brights!!! 🙂
LikeLiked by 1 person
Awesome job freehand painting!! The manicure looks great :o)
LikeLiked by 1 person
Thank you so much! Happy St. Patty’s Day to you too 🙂
LikeLiked by 1 person
Loving the inspirational St Patrick’s day manicure 🙂
LikeLike
Thank you, Janice! 🙂 I actually did a different version of the manicure on my other hand, but you’ll probably see it on IG!
LikeLiked by 1 person
Amazing!
LikeLike
Thank you! 🙂
LikeLiked by 1 person
How come?! I hadn’t seen this post yet?! Your themed mani is super funny and I love the greens you chose.(a lot!)
LikeLike
Thank you! And I have no idea! It’s been up. Maybe it was skipped in your reader?
LikeLike