Tools Needed: Dotting tool
How can you not like a panda? I once visited the San Diego Zoo to find the pandas turned away from the people, chomping on some bamboo. I thought it was sad and adorable at the same time. It’s also a great design because it’s black and white and will match with everything. Now I’m going to paint them on my nails. Let’s get started!
Here is a step-by-step tutorial on the Panda nails:

1. Start with a base coat to protect your natural nail bed.
2. Paint alternating nails black until they are opaque.
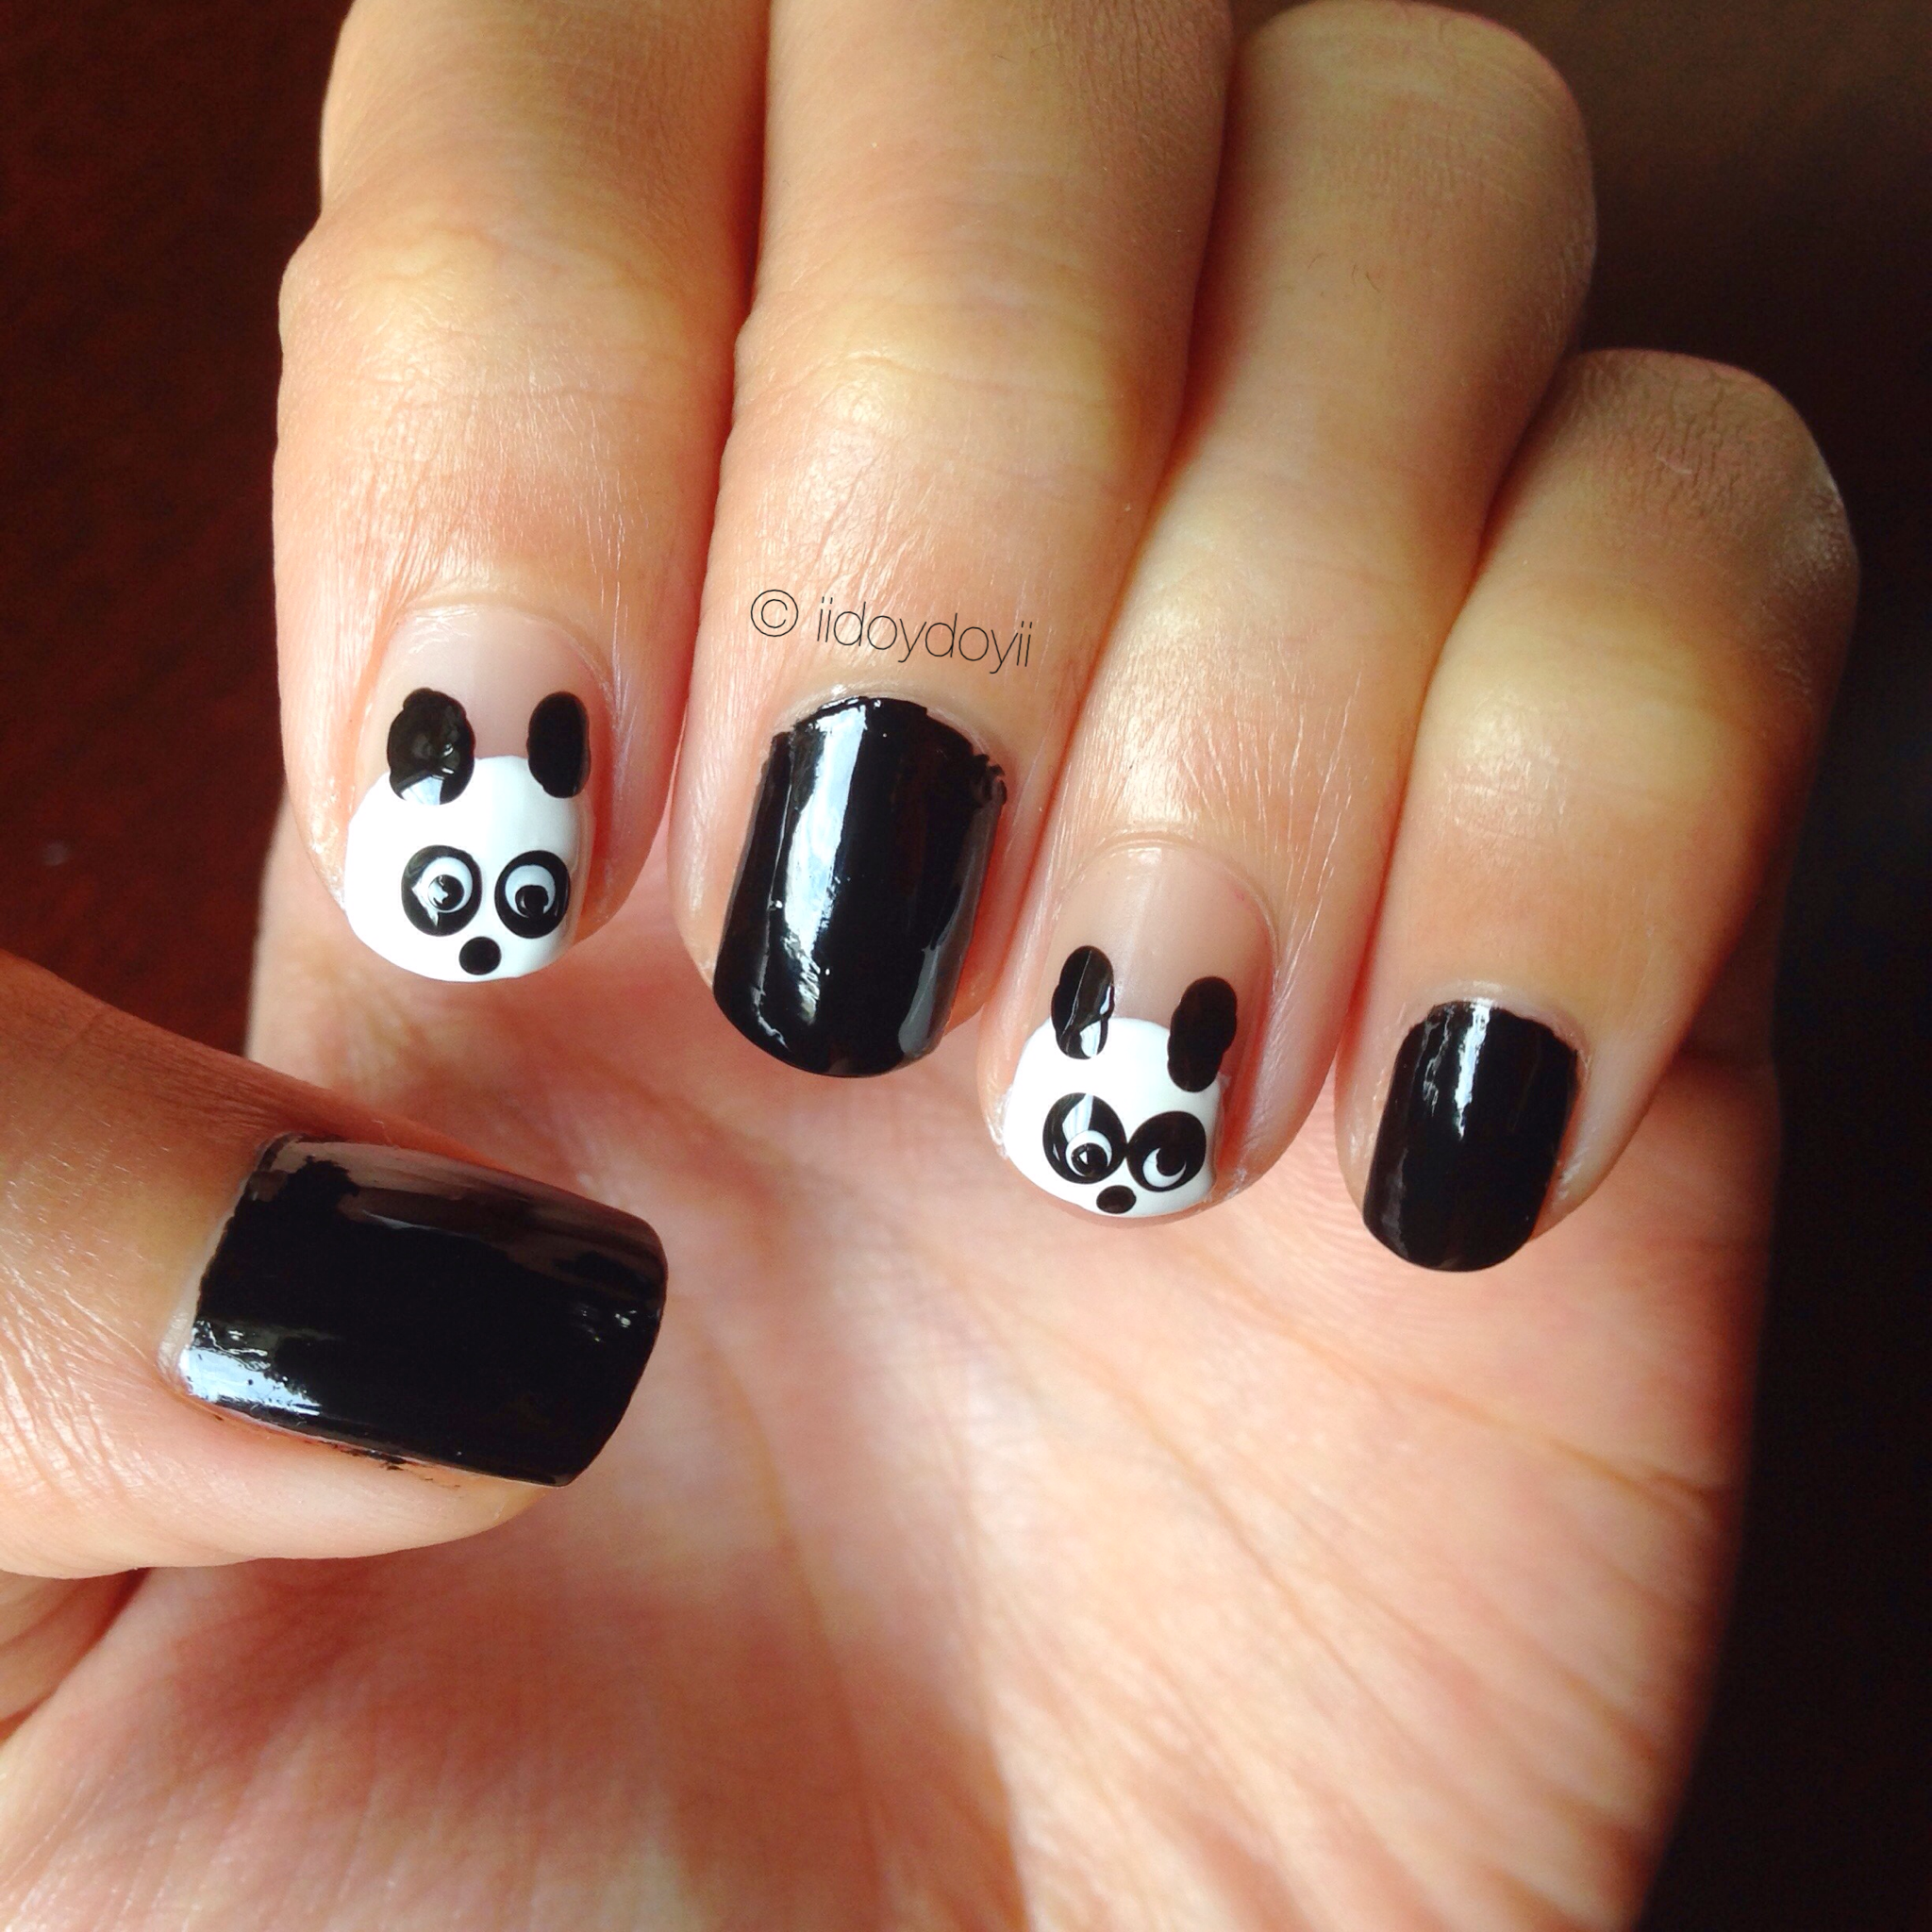
Panda time!
3. With the white polish, make a circle on the tip of your nail. It does not have to be perfect.
4A. With your dotting tool, dot on two black ovals on top of the white circle. Half of the oval should be on top of the white area.

4B. Dot two large black dots for eyes in the middle of the white area.
4C. Take a tiny dotting tool and dot below the eyes for a small nose.
4D. With white polish, dot a medium dot onto the large black dots.
4E. Now is the time to give your pandas some personality! Take the tiny dotting tool again and dot a black dot onto the white dot. As you can see, just by moving the dots in the white area, I made a focused panda and a drunk panda. Have fun with it!
 5. Once the manicure is done, seal the nail art design with a quick drying top coat. This will make the nail look shiny and the design last longer.
Panda nails are adorable and I’m really happy with the result!

List of Products:
Butter London Nail Foundation Flawless Base Coat
Butter London Hardwear P.D. Quick Top Coat
Julie G White Orchid
Julie G Black Sheep
I’d love to see your manicure. If you end up trying this nail look out, show/tag me on Instagram using the hashtag #iidoydoyii

So cute!!
LikeLike
Thank you Marika! 🙂
LikeLiked by 1 person
eeeeeeeeeeeeeee!!!!
LikeLiked by 1 person
Best reaction EVER.
LikeLiked by 1 person
That’s literally what I did. 😀
LikeLiked by 1 person
HAHA love it! Thank you for that 🙂
LikeLiked by 1 person
Toooooo cute!!!!! 👏😊🐼
LikeLiked by 1 person
Thank you!!!! 🙂
LikeLike
Holy crap, that’s so cute and creative!
LikeLiked by 1 person
Aww Thank you Melissa! 🙂
LikeLike
So cute! 🙂
LikeLike
Thank you girl! 🙂
LikeLiked by 1 person
So adorable!! Love these!!
LikeLike
Thank you for stopping by!
LikeLiked by 1 person
That is just adorable! Have you thought of doing youtube tutorials on these? It would be fab.
LikeLike
Thank you! That’s one of the first ideas my friend came up with for me.. was to do YouTube, but then I said no. Then I was asked if I could do a blog instead and I said hell yes to that!
LikeLiked by 1 person
So cute! Fab idea xx
LikeLike
Thank you! 🙂
LikeLiked by 1 person
You must have own a very light hands to do these adorbs!
LikeLike
Thank you! I try to stay as steady as possible.. I basically hold my breath LOL
LikeLiked by 1 person
So cute! I love pandas lol.
LikeLike
Thank you! Who doesn’t?! 🙂
LikeLiked by 1 person
super cute 🙂
LikeLike
Thank you so much!
LikeLiked by 1 person
Ahhhhhh! Adorable!
LikeLike
Thank you! Ahhh! lol
LikeLike
Wicked cute!!!!!!
LikeLike
Thank you Laurel!!!
LikeLiked by 1 person
So adorable!
LikeLike
Thank you girl!
LikeLike
Omg Joy this is adorable!! and you’re so cute you’ve created it! ❤
LikeLike
Thank you very much!!! 🙂 You’re always so kind!
LikeLiked by 1 person
Very cute 🙂
LikeLike
Thank you! 🙂
LikeLiked by 1 person
That panda on your index has seen some shit in its life – it looks shell shocked. And the other one has gone loco. Look at its EYES man! 😛
How fun are these?!!
LikeLike
Lol! It sure has! Thanks girl 🙂
LikeLiked by 1 person
A-dor-able!!
LikeLike
Thank you!
LikeLike
love, love, love!
LikeLike
Thank you, thank you, thank you! 🙂
LikeLiked by 1 person
Too cute!
LikeLike
Thank you Bree!
LikeLiked by 1 person
so sweet! :D:D:D
lots of xx, Annie | Annie’s Beauty
LikeLike
Thank you for stopping by! 🙂
LikeLiked by 1 person
You’re most welcome lovely! 😊xx
LikeLiked by 1 person
Pingback: My Favorite Styled with Joy Blog Posts | May 2015 | Styled with Joy